Jira Cloud integration configuration
Turn failed test runs into Jira Cloud work items, without leaving your team's existing workflow.
Understand how the Jira Cloud integration works
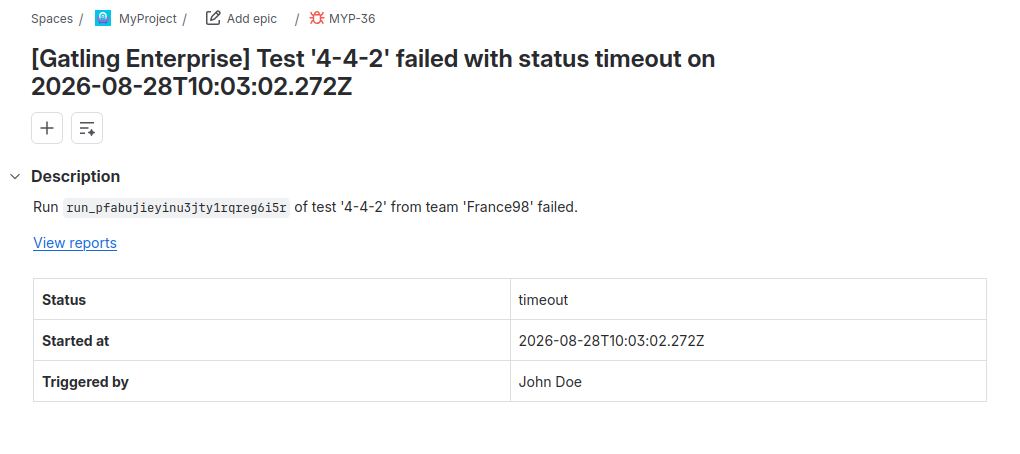
When a test run ends in a failure, Gatling Enterprise Edition creates a work item in the Jira Cloud project you chose for that test, then links it on the run’s page. Your team triages the failure from its own board, without opening Gatling.
The integration has two levels of configuration:
- Organization level: the Jira Cloud site Gatling connects to, and the account it authenticates as. Administrators set this up once.
- Test level: whether a test creates work items, and if so, in which Jira project and with which work item type. Anyone with edit access to the test can sets this up.
You need both. A test can’t create work items until an administrator has connected a Jira Cloud site to your organization.
Meet the prerequisites
Before you configure the integration, make sure you have the following:
- A Jira Cloud site. Gatling doesn’t support Jira Server or Jira Data Center.
- A Jira Cloud account that can browse your projects and create work items in the projects you target.
- An API token for that account.
- A target project with a work item type that requires only a summary and a description.
Prepare your Jira Cloud account
Gatling authenticates against Jira Cloud with an account email and an API token, so create a token before configuring the integration.
Follow the official Atlassian documentation to create an API token for the account you want Gatling to use. The token needs both of these scopes:
read:jira-work: lists your projects and their work item types.write:jira-work: creates work items.
Then add the account as a member of every project you want Gatling to write to. Without that membership, work item creation fails even when the token carries both scopes.
We recommend a dedicated service account rather than a personal one: whoever owns the token appears as the reporter on every work item Gatling creates, and a personal account loses access when its owner leaves.
Keep the token for the next step. Gatling needs it together with the account’s email address and your Jira Cloud site URL, such as https://your-company.atlassian.net.
Connect Jira Cloud to your organization
Go to your organization settings, open the Notifications tab, then the Jira Cloud section.
Fill in three fields:
- Jira instance URL: your Jira Cloud site, for example
https://your-company.atlassian.net. - Account email: the email address of the Jira Cloud account Gatling authenticates as.
- API Token: the token you created for that account.
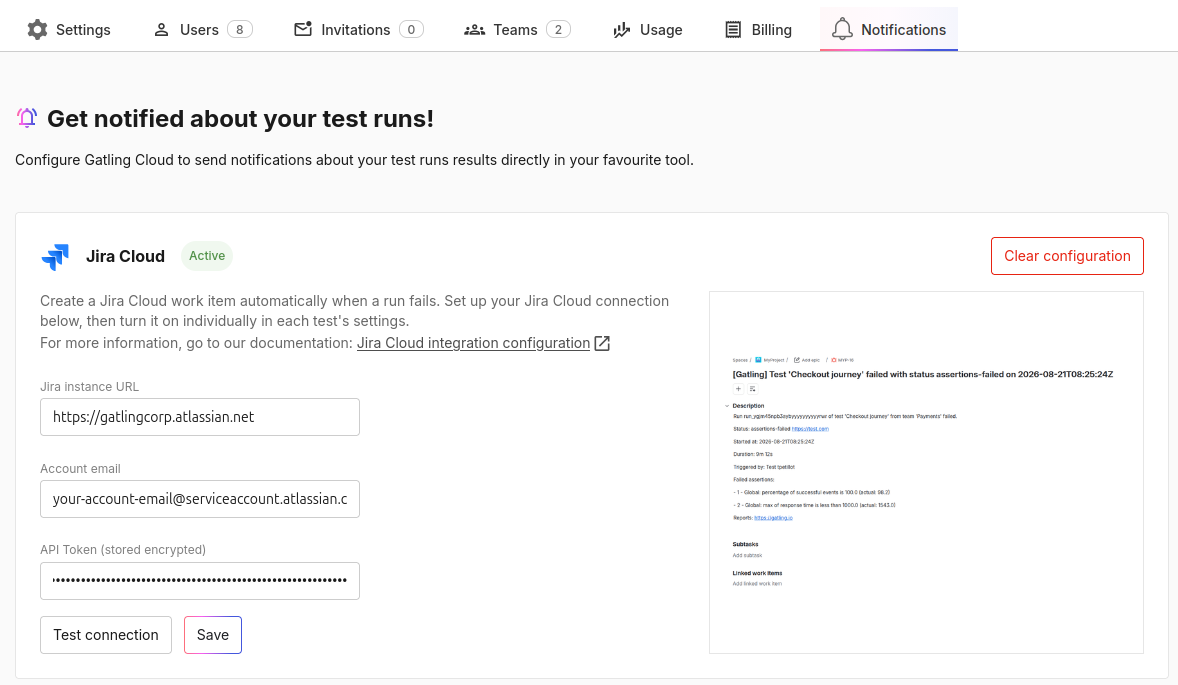
Then use the two buttons at the bottom of the form:
- Test connection verifies the credentials and confirms Gatling can list your Jira Cloud projects.
- Save stores the connection.
A note about data security:
- Gatling encrypts your API token before storing it.
- Selecting Clear configuration deletes the API token permanently.
Configure Jira Cloud for a test
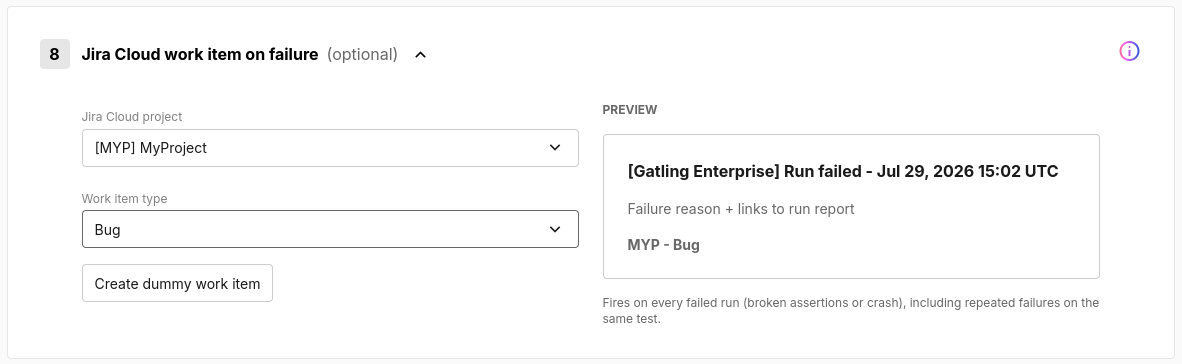
Open the test settings, then the Jira Cloud work item on failure section. Anyone with edit rights on the test can do this.
- Choose the target project. You can start typing to search your Jira Cloud projects by name.
- Choose the work item type. The list shows the work item types available in the project you chose.
- Select Create dummy work item to confirm the whole chain works end to end.
- Open the link below the button to check the work item Gatling created in Jira Cloud.
See an example work item
The run’s summary shows the work item key alongside the run details.
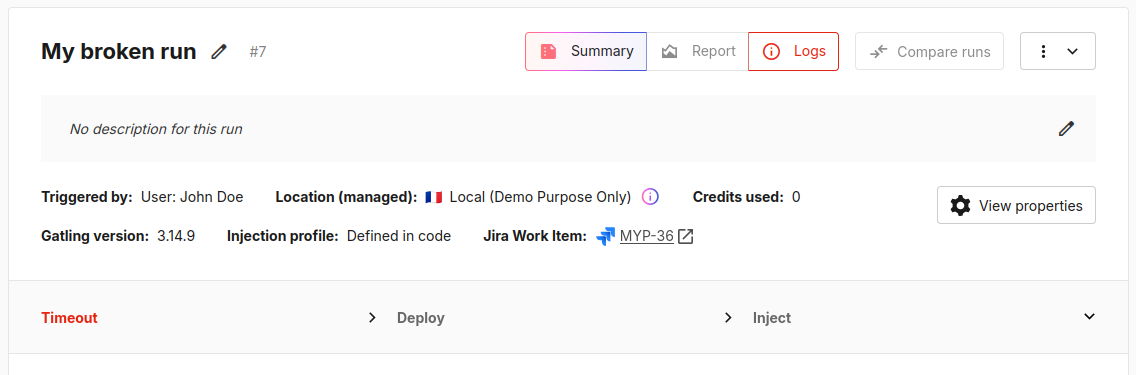
Open the link to land straight on the work item in Jira Cloud.