

Create and manage campaigns
Create campaigns, link your tests, and manage them over time.
Create a campaign
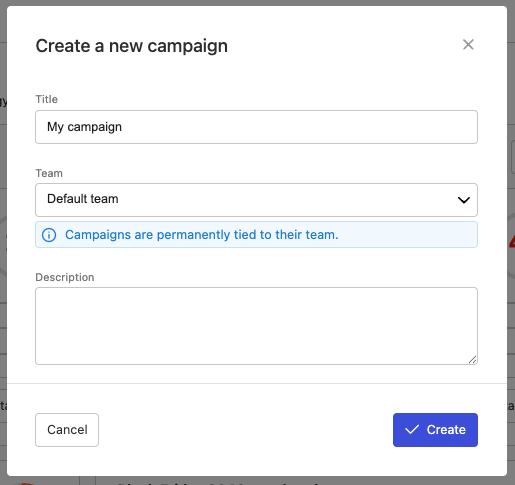
To create a campaign, click Create a campaign from the Campaigns list.
When creating a campaign, provide:
- A title that reflects the performance purpose the campaign is tracking.
- The team that will own the campaing
- An optional description with additional context.
Each campaign belongs to a team and this assignment cannot be changed after creation. The team determines which tests are eligible to be linked to the campaign: only tests that belong to the same team can be added.
Link tests to a campaign
Tests are linked to a campaign from the campaign detail page. Click Manage tests to open the test managelent modal, which lists all tests belonging to the campaign’s team.
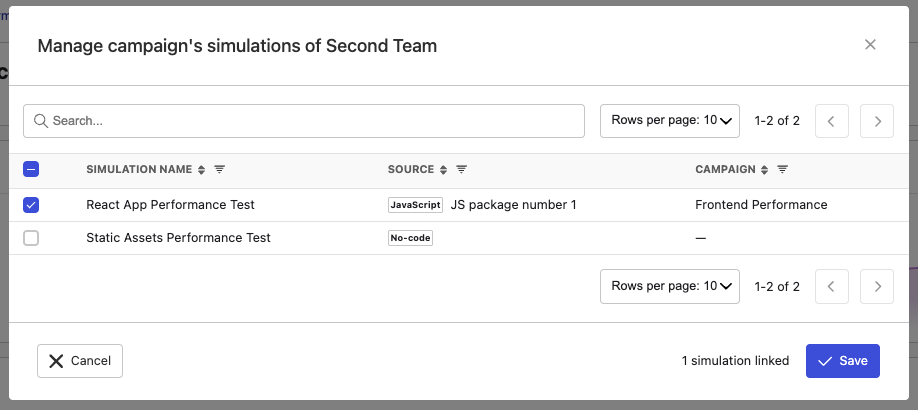
Select the tests you want to include and confirm. The campaign will start tracking scores for those tests from their next completed run.
Unselect the tests you want to remove from the campaing and confirm. The campaign will start tracking scores for the remaining tests from their next completed run.
You can update the list of linked tests at any time. Adding a test starts tracking it from its next run; removing a test stops tracking it but does not affect historical scores already recorded.
Edit a campaign
To edit a campaign’s title or description, open the campaign detail page and click Edit. The team assignment cannot be changed.
Delete a campaign
To delete a campaign, open the campaign detail page and click Delete. Deleting a campaign removes it and all its recorded scores permanently. The tests themselves are not affected.