Gatling Studio
Create a Gatling project in seconds using Gatling Studio.
Introduction
Gatling Studio allows you to record a user journey in your browser and turn it into a Gatling-ready load test Scenario.
Gatling Studio is a native application installed on your system and run locally.
In this documentation, we present how Gatling Studio works and explain how to:
Requirements
- You must have a Gatling Enterprise Edition account to log in. Sign up for a free trial if you don’t already have an account.
- Latest version of Gatling Studio
- Chromium-based web Browser installed on your system (Chrome, Edge, …)
Installation
Gatling Studio is available for macOS, Windows, and Linux operating systems. Download the latest version of Gatling Studio from the Gatling Studio Github releases page
Once downloaded, open the file and install Gatling Studio on your system.
Log in to Gatling Studio
When you open the application, the first page allows you to log in with a Gatling Enterprise Edition account.
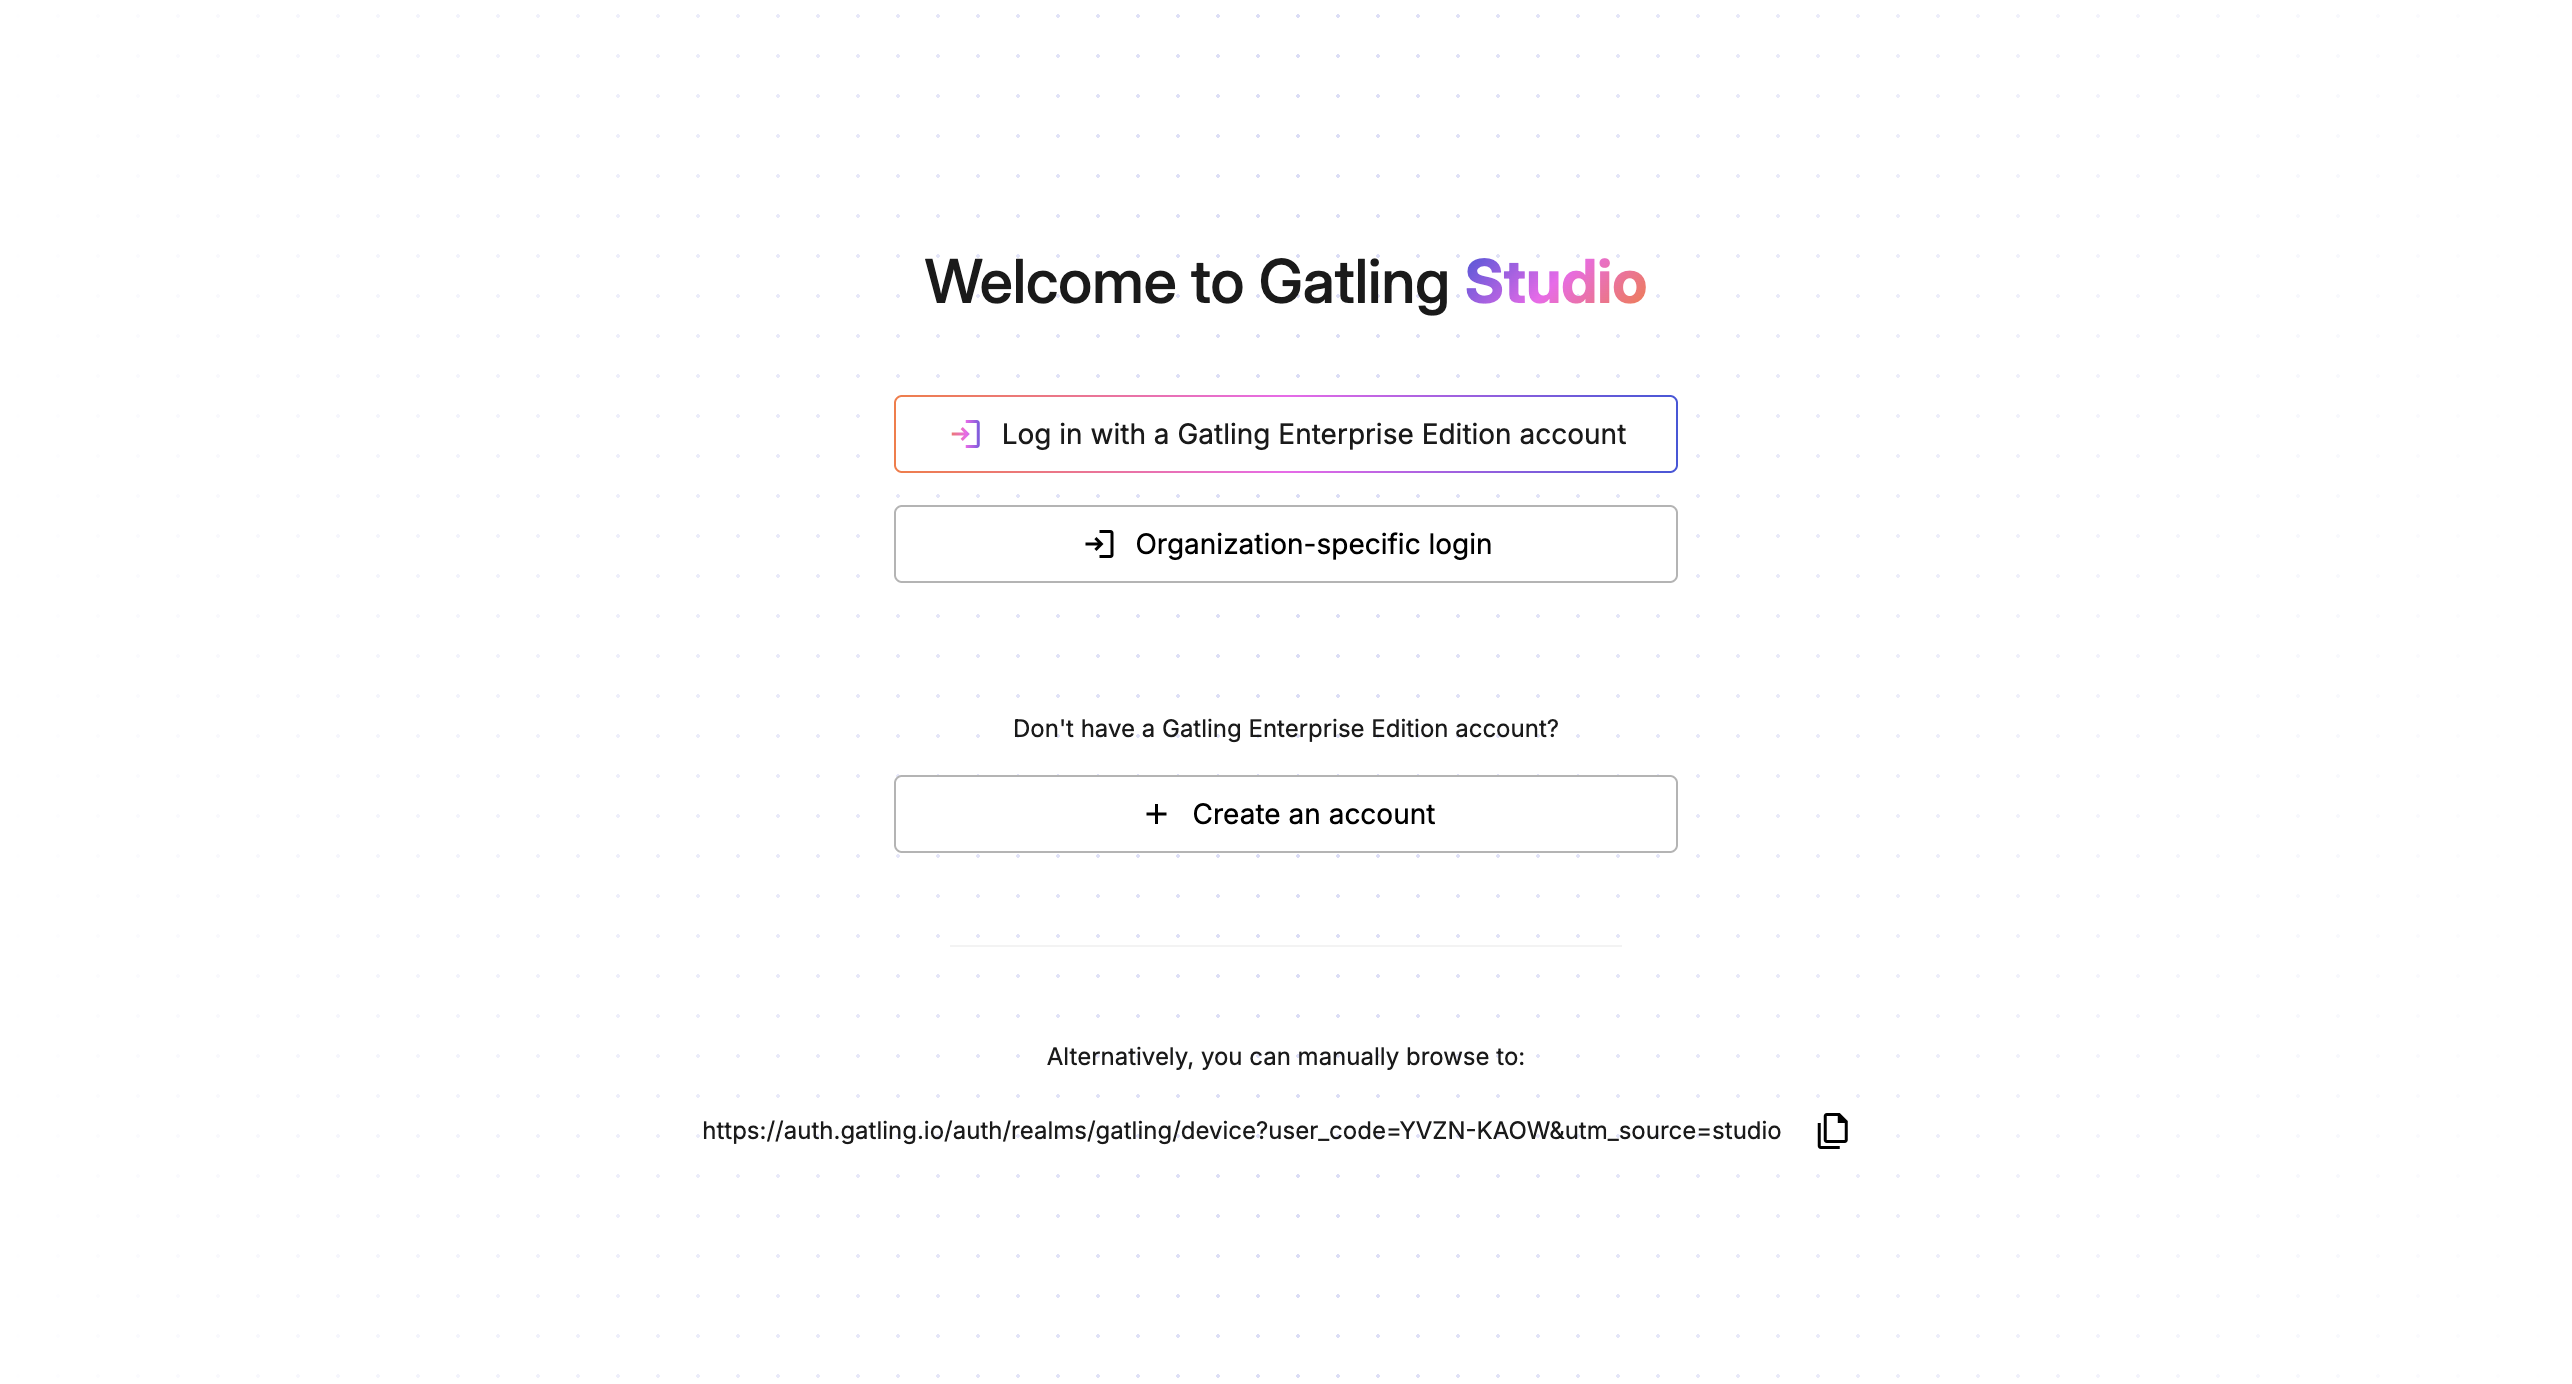
- Click Log in with Gatling Enterprise Edition account, to log in
- You are redirected to the Gatling Enterprise Edition login page.
- Enter your credentials and log in.
- Immediately after logging in, Gatling Enterprise Edition prompts you to grant access to certain properties. Click on yes to allow Gatling Studio to link to your Gatling Enterprise Edition account.
- After a successful login, you can close the browser window and return to Gatling Studio.
- With the button Organization specific log in, you can reach your custom organization login, if applicable. Follow the same login process you use for your Gatling Enterprise Edition account.
- If you don’t already have a Gatling Enterprise Edition account, you can use the “Create an account” button to sign up.
Workspaces
Initially, your need to set a workspace.
A workspace is a folder on your computer where Gatling Studio stores your recordings (HAR files), scenarios, and exported projects.
Choose an existing folder or create one.
Later, you can create multiple workspaces and switch between them from the main menu on the left. You can also open the workspace management modal to create, delete, or select a workspace.
Recordings
The landing page is the Recordings page.
Gatling Studio records all requests when browsing a website.
Create a new recording
Click on Record a journey to start the recording process.
On your first recording, Gatling Studio asks you to set your browser configuration.
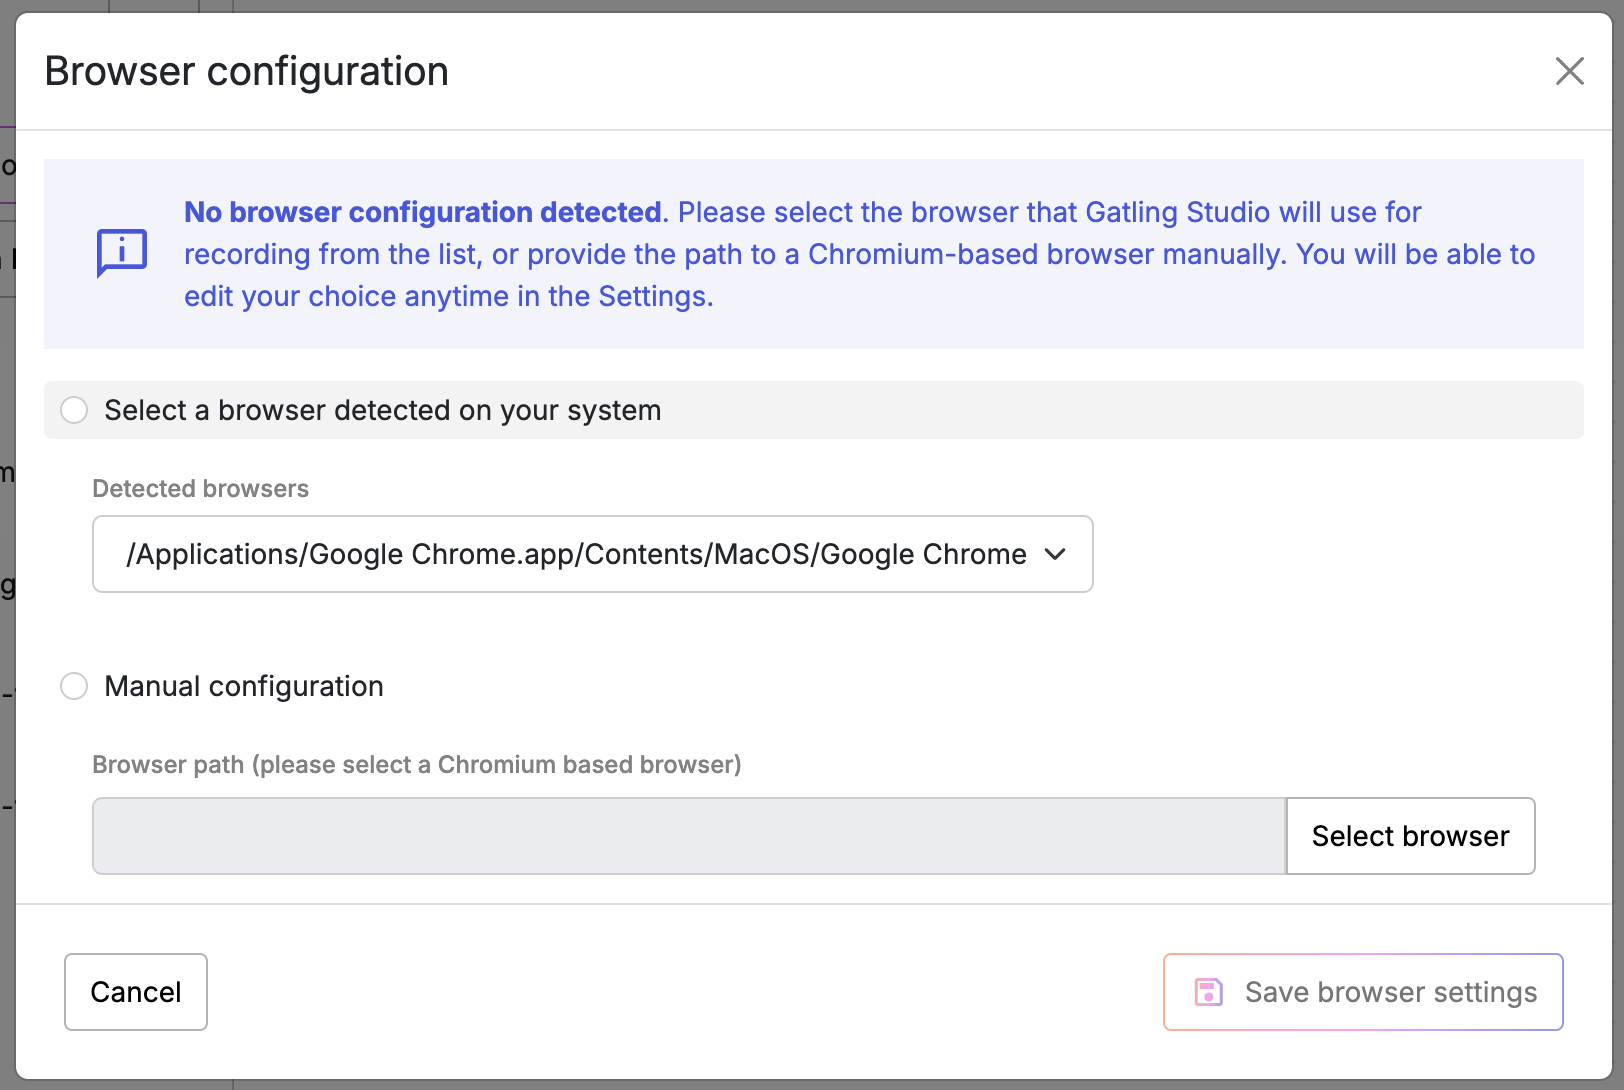
You can select:
- A web browser in the list of automatically detected browsers
- If your favorite browser is not in the list, you may provide a path to a Chromium-based web browser installed on your computer.
Edit this choice anytime in the Settings.
Once the setting is saved, enter the URL you want to explore.
By providing a valid HTTPS URL and hitting “start the recording”, Gatling Studio opens a web browser on the provided URL. You can browse by following the desired user journey. When you are satisfied with your navigation, you can close the browser, which ends the recording. Gatling Studio then allows you to modify the name of the recording.
Click Save to add the recording to the list. Recordings are saved as a HAR file in your workspace. You can open the workspace recording folder in your system file explorer by clicking on the folder icon next to “Recordings”.
Import an existing HAR file
You can import an existing HAR with the “Import a HAR” button. We cannot guarantee the proper functioning of HARs not recorded by Gatling Studio.
Visualize the recording details
Select a recording in the list to visualize registered requests.
Clicking on a specific request will display its details. You will be able to see the header, body, or raw file of both the request and the response.
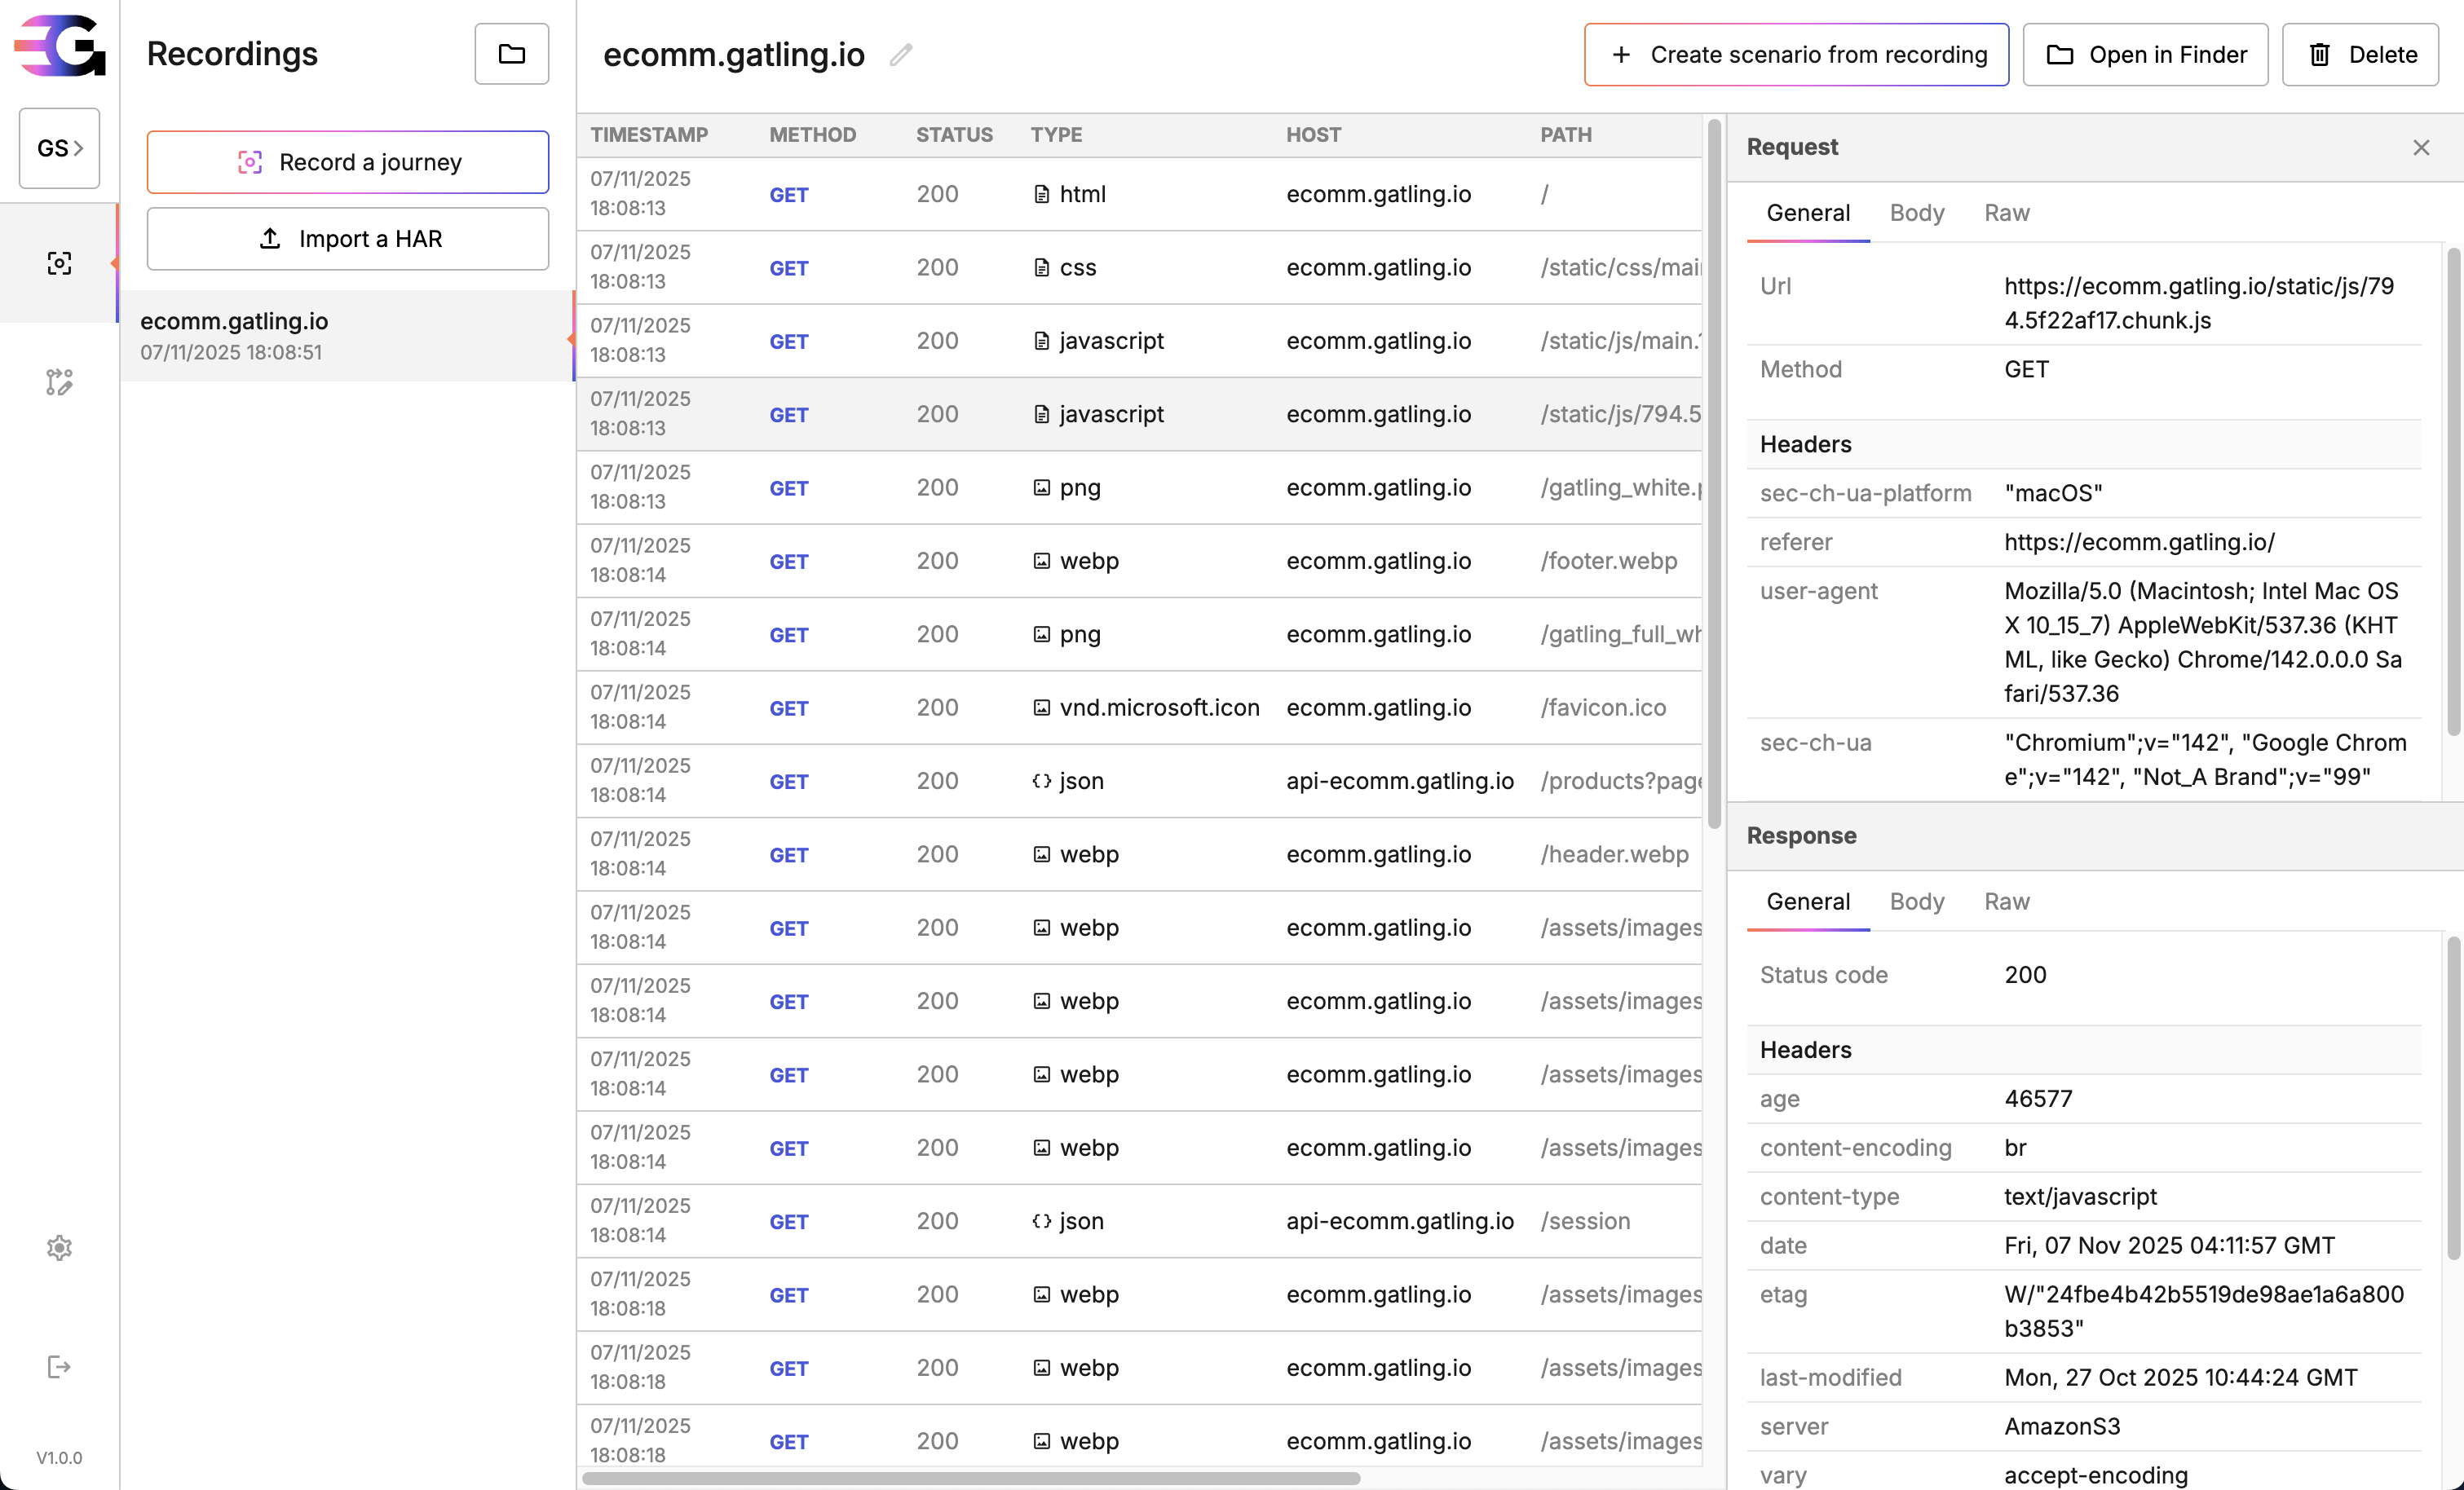
In the recording header, you can:
- Edit the recording name (by clicking on the pencil icon next to the name). This changes the HAR file name saved in your workspace. The file name is the title of the recording.
- Create a Gatling scenario from the recording. See the Scenario section of this documentation.
- Open the recording folder of your current workspace with the recording selected
- Delete the recording. The HAR file will be permanently deleted.
Scenarios
Scenarios are the first steps toward Gatling Tests. A scenario is a user journey used to test your solution.
Create a new scenario
To create a scenario, you can:
- Go to the Scenario page, click on Create a scenario and select a recording in the list
- Go to a specific recording and click on Create a scenario from recording in the header
Then, the scenario filter will show up.
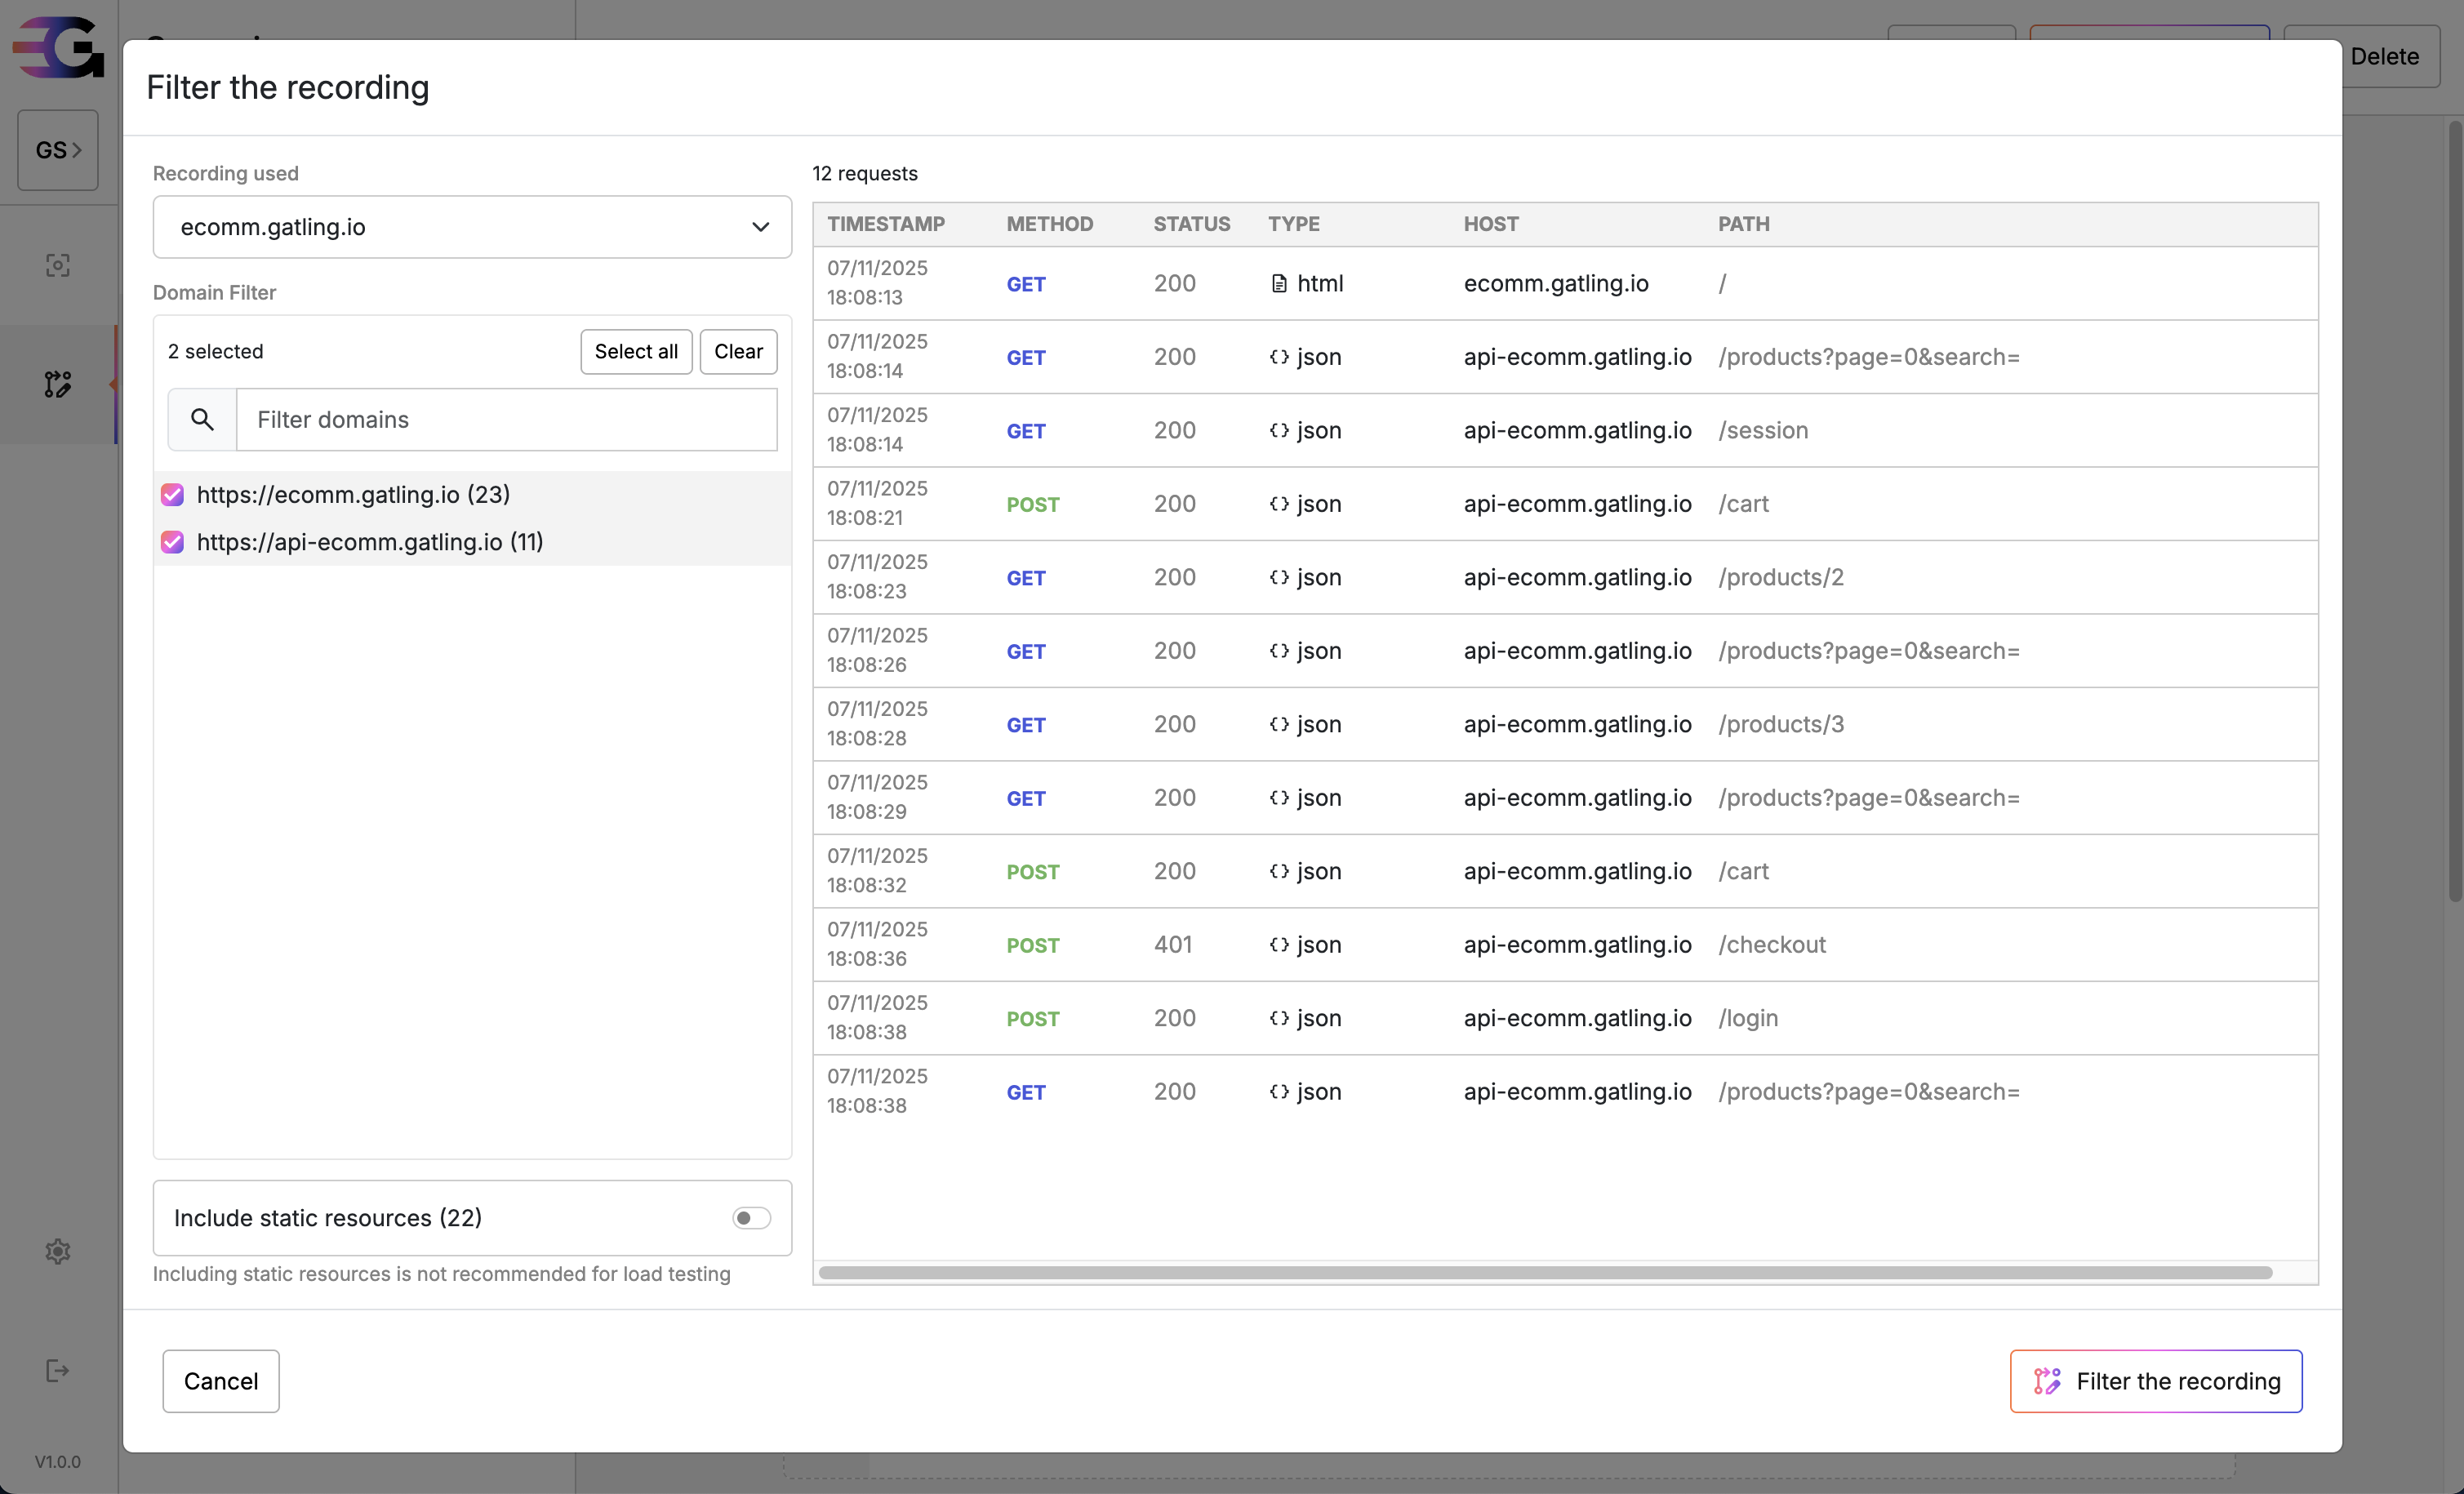
You can:
- Change the recording used
- Select/unselect specific domains
- Add/remove the static resources
- Have a preview of filtered requests that will be used in the scenario
When you have selected only the desired request, click Save to visualize the scenario.
You can edit your filters by clicking on Edit in a Scenario.
Visualize a scenario
Gatling Studio will automatically regroup all filtered requests with a timestamp below 100ms and add pauses between request groups based on the recording timing.
The whole scenario is displayed as it will be used in the Gatling Test.
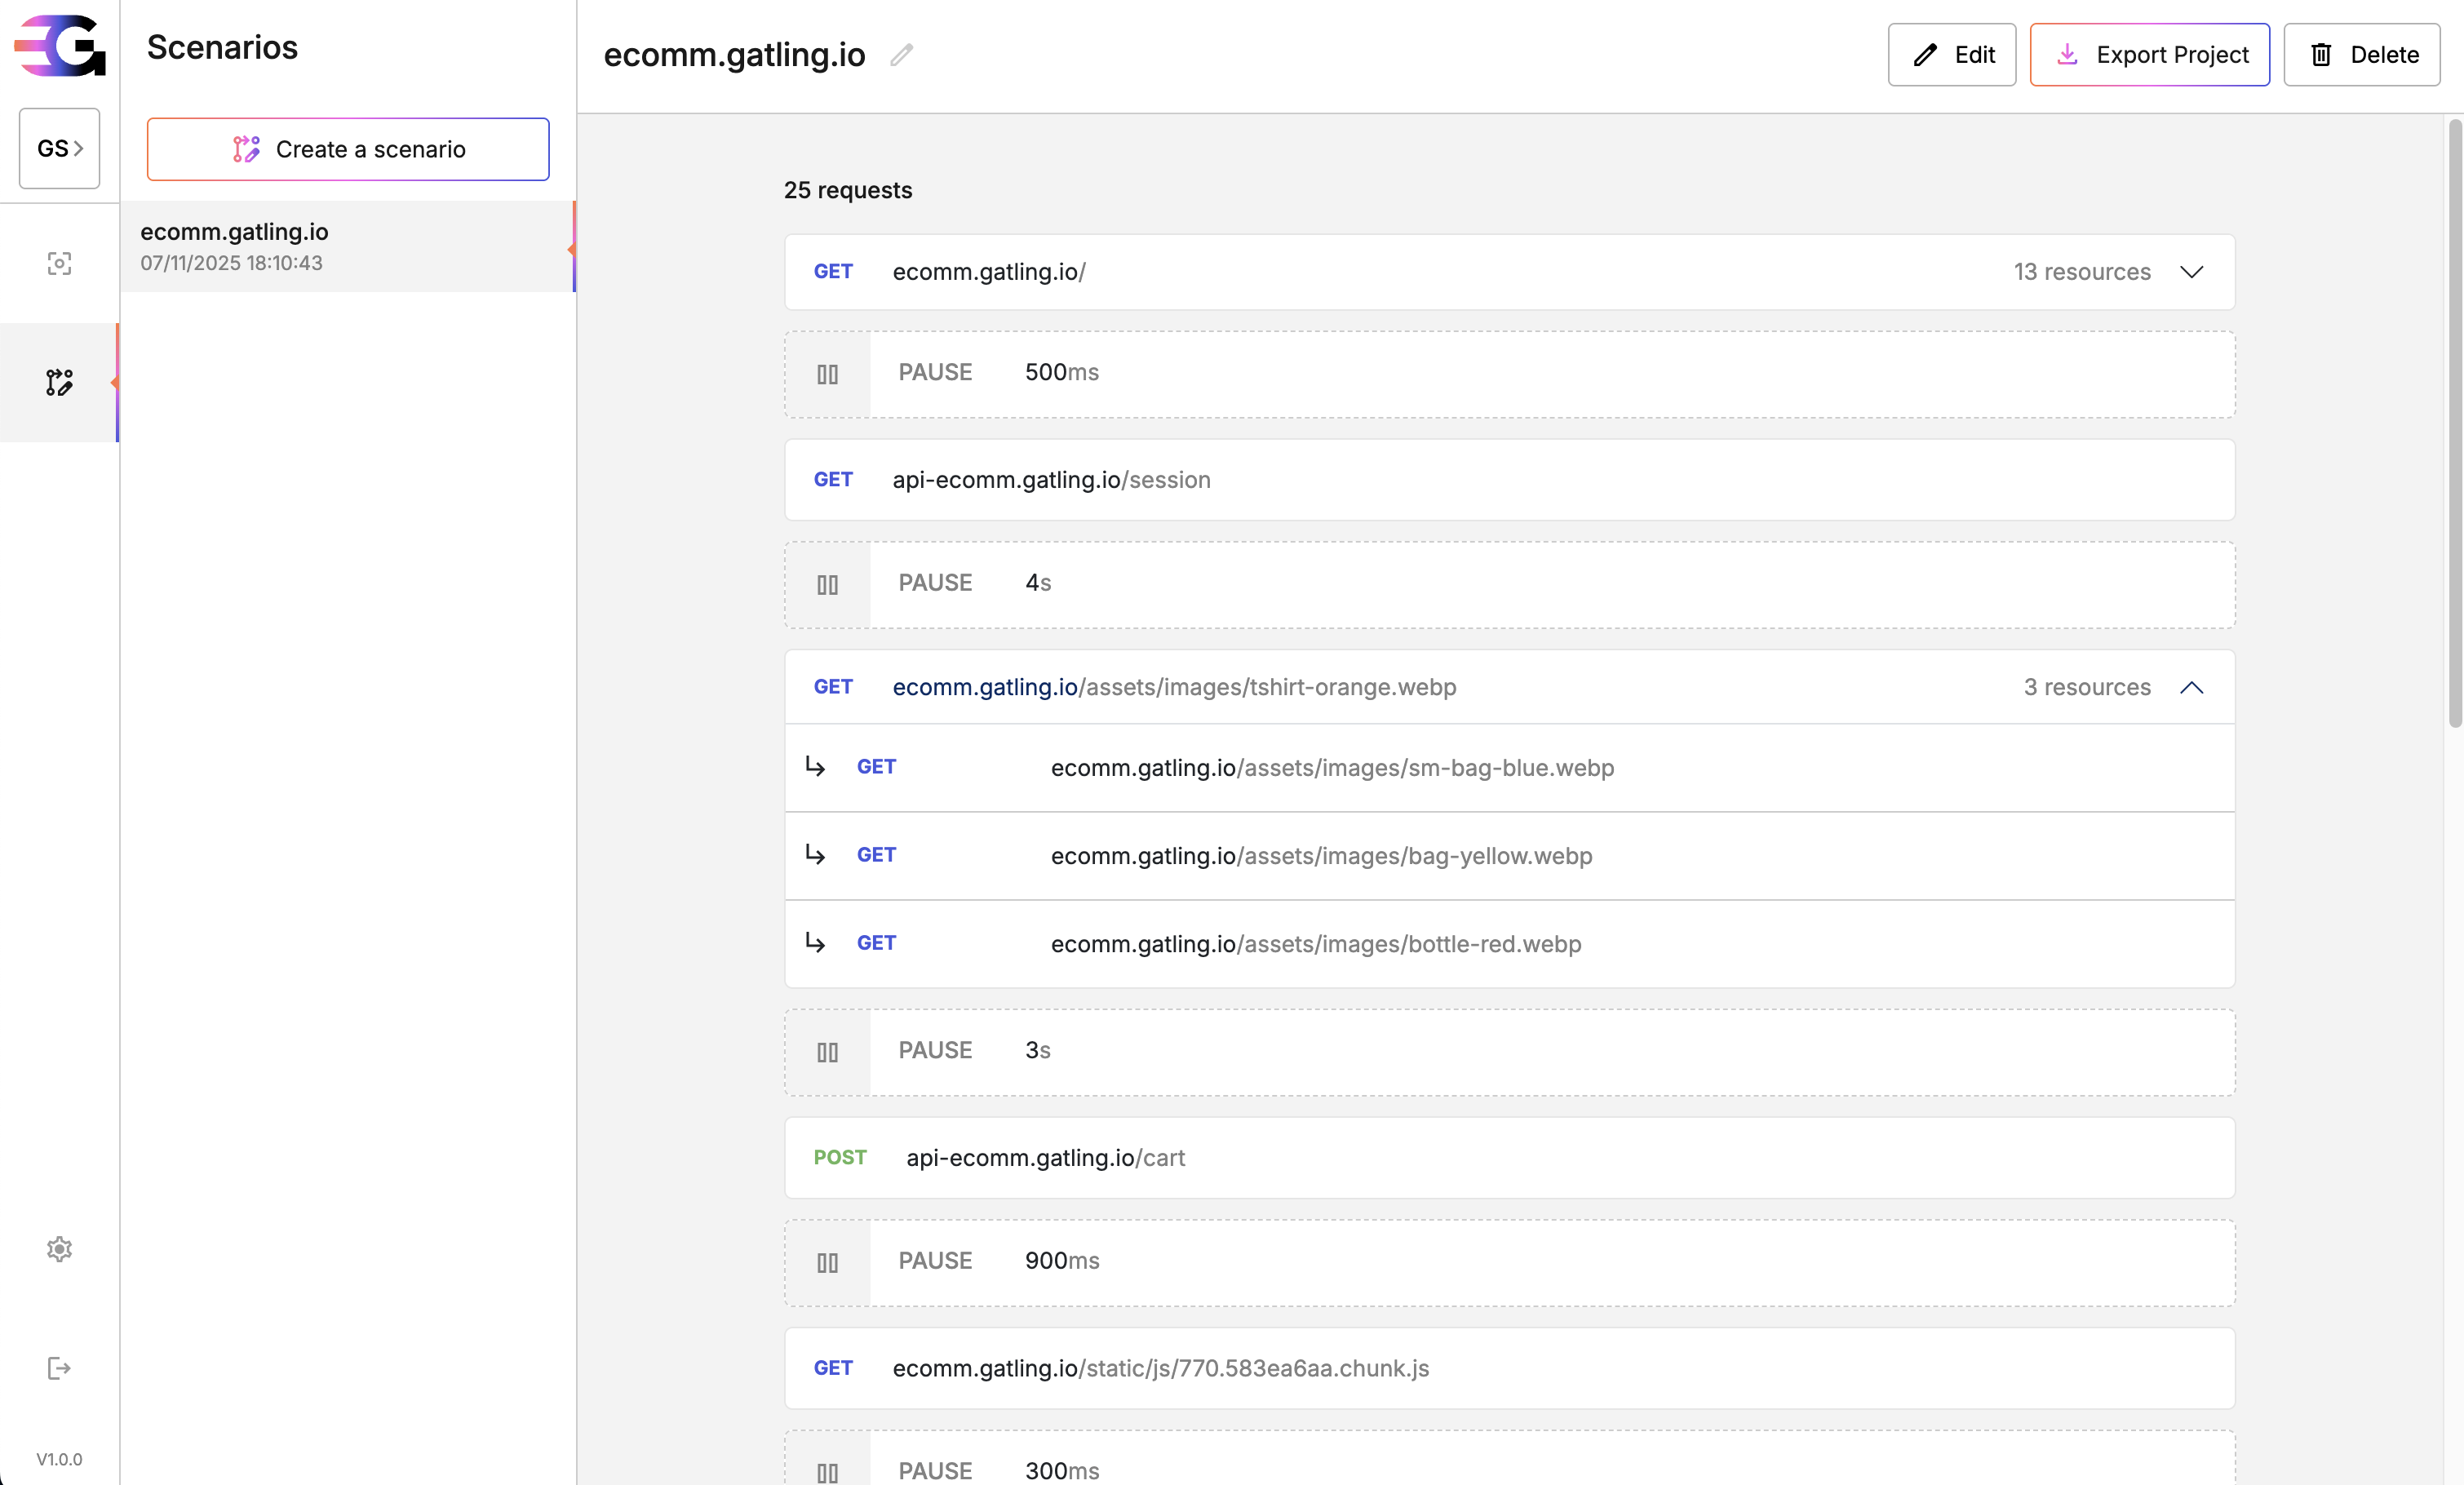
In the scenario header, you can:
- Edit the recording filter as explained above.
- Export a project. See the Export as Gatling Project section of this documentation.
- Delete the scenario. The scenario file will be permanently deleted.
Export as Gatling Project
The Export project button allows you to download a functional Gatling Project filled with your Scenario.
You can then use your local environment to run your Gatling Test locally, edit parameters, and package it to upload to Gatling Enterprise Edition.
Sec-* headers are not relevant in the context of load testing and are filtered out when a project is exported.Settings
Browser settings
This page allows you to edit your browser configuration for recording.
You can select a web browser in the list of detected ones.
If your browser is not in the list, you may manually provide a path to a Chromium-based web browser installed on your computer.
Proxy settings
If your computer is behind a proxy, Gatling Studio allows you to specify your own configuration by filling in:
- the protocol your proxy is using (either HTTP or HTTPS),
- the hostname and,
- the port.
Note that this configuration only applies to Gatling Studio itself and not your recorder. If your browser needs to use your proxy, update your browser’s settings directly.
Feedback
We are very interested in our community feedback.
This is a first version; we have a very long-term vision, and many features will be released gradually.
Feel free to share your feedback, any problems you encounter, or feature requests on the GitHub issue sections. We’d love to discuss them with you to build a better testing experience together.